
Peel-and-Stick Power: 10 Surfaces Home Stagers Can Transform with Lamination Film Instead of Renovation
- Giwett

- Dec 14
- 6 min read
Why Home Stagers Need Peel-and-Stick Lamination Film
Tight timelines, fixed budgets, and demanding sellers—home stagers constantly work between “as-is” and “move-in ready.” Full renovation is rarely an option:
Owners don’t want to invest in new doors, cabinets, or panels before selling.
Contractor schedules and permits can delay a listing for weeks.
Rental and occupied homes often forbid major work, sanding, or strong odors.
The result? You end up styling around yellowed doors, dated oak cabinets, scratched furniture, and mismatched finishes that drag down photos and buyer perception.
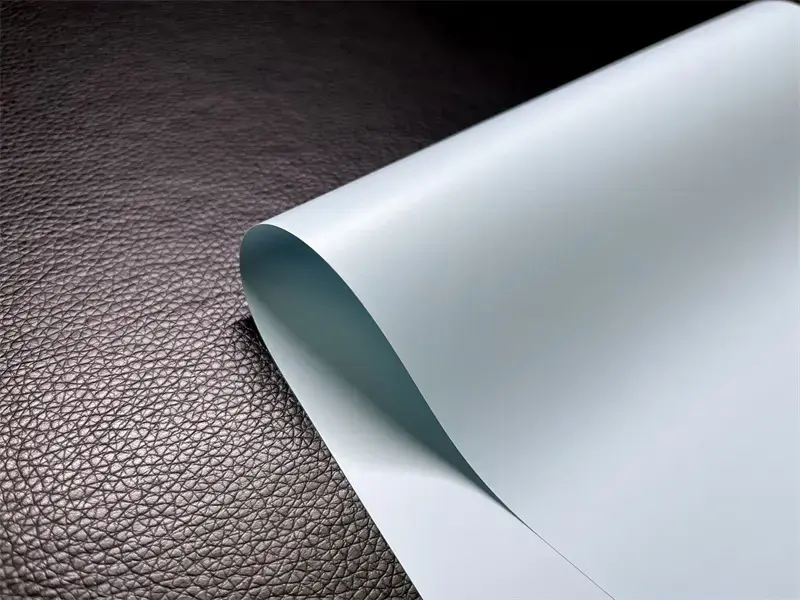
High-quality peel-and-stick lamination film (also called PVC decorative film or peel and stick wallpaper alternative) changes the equation. Instead of replacing doors and panels, you reskin them—cleanly, quickly, and at a fraction of renovation cost.
The Benefits of Lamination Decorative Film for Home Staging
Modern lamination decorative films are far beyond old-fashioned contact paper. For professional home staging, they deliver five key advantages.
1. Attractive, on-trend designs
From warm wood-grain film and veined marble film to brushed metallic finishes, soft-touch matte and fabric-look textures, you can match almost any design concept:
Scandinavian light wood
Modern farmhouse with soft whites
Luxury city condo with metal and stone
Minimalist loft with matte, neutral doors
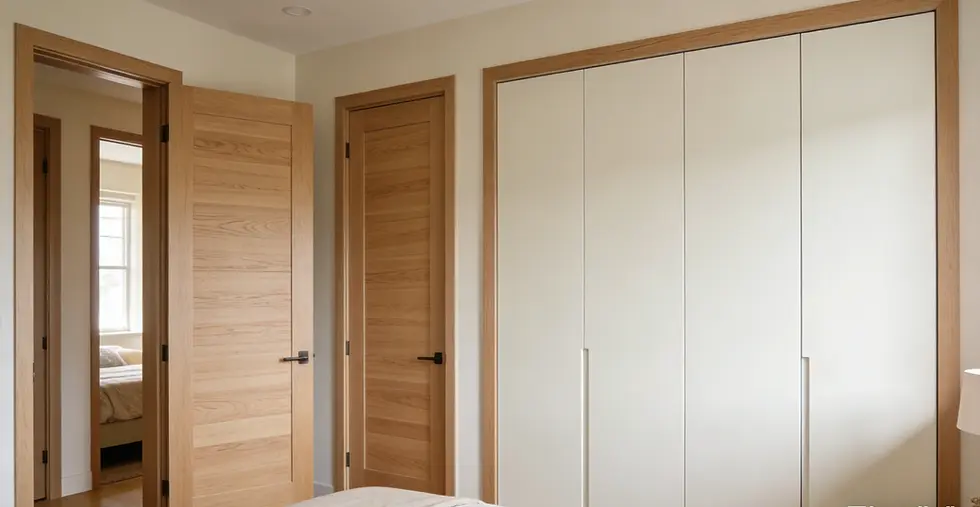
Using one coordinated decorative film collection, you can align doors, wall paneling, wardrobes, and furniture across the whole property.

2. Wide range of applications
Unlike standard peel and stick wallpaper that is limited to walls, lamination film works on many rigid surfaces:
Interior doors & door frames
Entry doors under cover
Wardrobes and closet doors
Kitchen cabinets & bathroom vanities
Wall paneling, ceilings, acoustic boards, and furniture fronts
This flexibility means you can carry just a few rolls on site and completely upgrade multiple home staging surfaces.
3. Cost-effective alternative to renovation
Replacing an interior door or custom cabinet front can cost more than resurfacing an entire room with PVC decorative film. With lamination film you:
Avoid demolition and waste removal
Reduce labor hours
Keep properties show-ready with minimal disruption
For many listings, lamination film on doors and cabinets produces listing photos that look like a remodel—without the renovation budget.
4. Durable, staging-proof finishes
Door-grade lamination films are developed for daily use:
Scratch-resistant and easy to clean
Designed to resist fading and yellowing
More robust than most DIY peel and stick wallpaper
With proper installation on smooth substrates, these surfaces can last for years—far longer than a typical home staging period—yet still install and remove more cleanly than paint or varnish.

5. More sustainable than replacement
Instead of sending still-functional doors and panels to landfill, you upgrade the surface only. Many modern films are low-VOC and compatible with existing substrates, helping stagers offer eco-conscious, low-waste transformations that appeal to today’s buyers.
10 Surfaces You Can Transform with Peel-and-Stick Lamination Film
While lamination film works almost everywhere, doors are the real star. They appear in every corridor shot and buyers touch them constantly. Upgrading a dated door package to a coordinated, modern look instantly improves perceived value.
Use this quick-reference table to see where lamination film can replace renovation in your staging projects.
Surface for Home Staging | Typical “Before” Problem | Result with Lamination Decorative Film | Suggested Finish Ideas | |
1 | Interior doors (primary focus) | Orange oak, scratches, mixed colors room to room | Seamless, modern door set that photographs like new | Oak wood grain, walnut, white ash, soft-touch matte white |
2 | Entry door (covered) | Faded veneer, scuffs, outdated stain | Fresh, inviting first impression without replacing slab | Dark wood grain, charcoal metallic, panel-look design |
3 | Closet & wardrobe doors | Slab looks cheap, mirrored doors feel dated | Built-in wardrobe look that matches staged furniture | Fabric texture, light wood grain, warm beige matte |
4 | Kitchen cabinet fronts | Busy grain, chipped finish, mismatched uppers/lowers | “Remodeled” kitchen for photos without gut renovation | Marble-look island + wood-grain lowers, clean white uppers |
5 | Bathroom vanities & side panels | Swollen particle board, yellowed laminate | Spa-like vanity matching tiles and mirrors | Marble stone, light oak, soft-touch greige |
6 | Wall paneling & feature walls | Old paneling, uneven paint, patched drywall | Statement wall behind sofa or bed, hides minor defects | Vertical wood slats, acoustic-look stripes, fabric texture |
7 | Ceiling beams & coffers | Dark, heavy wood or stained MDF | Lighter, more contemporary ceiling that opens space | Whitewashed wood grain, matte warm white |
8 | Built-in shelves & displays | Cheap melamine, scratched edges | Store-like display that highlights styled accessories | Brushed metal backing, walnut wood-grain shelves |
9 | Furniture fronts (dressers, sideboards, nightstands) | Mixed pieces, visible wear and tear | Cohesive “set” that looks custom and photo-ready | Same finish as doors, or contrasting metallic accents |
10 | Frames, trims & door casings | Yellowed trim, chipped paint, mismatched tones | Clean, coordinated lines that frame each room | Matte white, black metal-look, matching door color |
Quick Installation Tips for Home Stagers
You don’t need to be a professional installer to get good results—especially on interior doors and flat panels. Here’s a simple, staging-friendly process:
Step-by-step basics
Assess the surface
Make sure doors and panels are structurally sound (no loose cores or severe warping).
Minor scratches and small chips are fine; deep holes should be filled and sanded.
Clean and degrease
Wipe the surface with a mild cleaner or diluted degreaser to remove dust, oils, and fingerprints.
Let everything dry completely before applying lamination film.
Measure and pre-cut
Measure the door or panel and cut the lamination film 2–3 cm (≈1 inch) larger on all sides.
Pre-cut around hinges or cut the film in sections if needed.
Apply from top to bottom
Peel back a small strip of backing at the top.
Align carefully, then smooth down using a squeegee or soft cloth, working from the center outward to push out air.
Continue in sections
Slowly peel more backing while smoothing as you go.
Keep tension light to avoid stretching the film.
Finish edges & trim
Wrap edges neatly around the door or trim flush with a sharp blade.
Recheck corners and press firmly so they don’t lift.
Common mistakes to avoid
Skipping cleaning: Dust and grease will cause bubbles and early lifting.
Rushing alignment: If the first 10–20 cm are crooked, the whole door will look off. Gently lift and realign before you go further.
Using dull blades: Dull cutters tear the film at edges—always use fresh blades for clean lines.
Overstretching around edges: Stretching makes the pattern distort and can cause corners to pop up later.
For larger projects, many stagers work with a handyman or installer the first time, then confidently handle simpler pieces like wardrobe doors and furniture on their own.
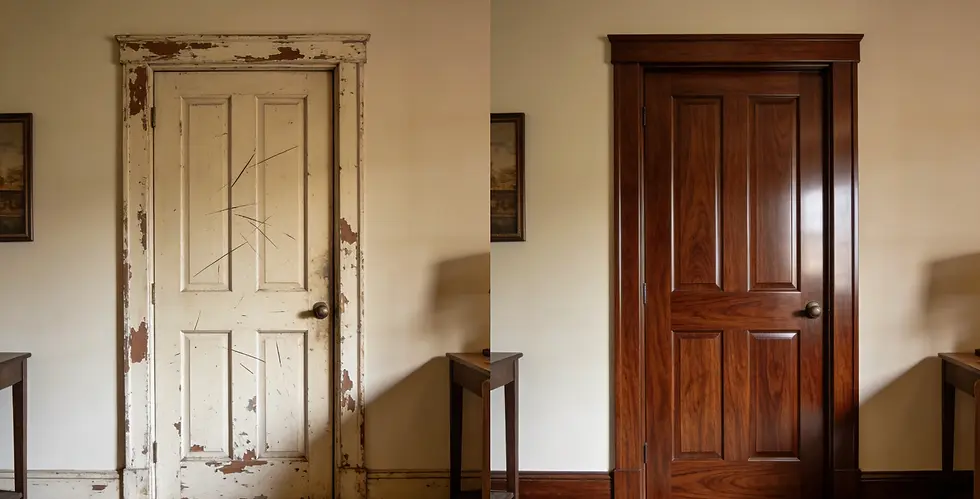
Mini Case Study: From Dated Doors to “Just Renovated” Listing in One Day
ScenarioA 3-bedroom suburban home had 9 interior doors in orange oak veneer and 2 mirrored closet doors that dated the entire space. The seller refused to replace the doors or invest in a full repaint.
Staging challenges
Door color clashed with the new light flooring and soft furnishings.
Mirrored doors made the bedrooms feel old-fashioned in listing photos.
Budget and timeline only allowed for 1 day on-site work before photography.
Solution with lamination film
The stager selected a light oak wood-grain lamination film for all interior doors and a soft-touch warm white for the closet doors.
One installer plus one assistant completed:
Resurfacing of 9 interior doors (front-facing sides)
Resurfacing of 2 closet doors
Matching lamination on 2 low sideboards used in the living room
Results
The hallways and rooms now read as a cohesive, modern package in photos.
The listing description could honestly mention “updated interior doors and built-ins” without any structural renovation.
Total material + labor cost was significantly lower than replacing all doors, yet visually the property felt “lightly remodeled.”
For home stagers, this kind of result—one-day door and surface transformation with lamination film—can be repeated across multiple listings, becoming a signature upgrade.
Doors First, Then the Rest: Building a Cohesive Story
For home stagers, doors behave like visual anchors. If the doors look new, buyers subconsciously assume the entire property has been updated.
Start by standardizing all visible interior doors with one or two PVC lamination film designs—for example:
Soft-touch warm white for modern listings
Light oak wood-grain for family homes
Extend the same film to closet doors, frames, and key furniture pieces.
Tie in wallpapers or peel and stick wall murals only where needed as accents, while the lamination film keeps all hard surfaces consistent.
This strategy builds a continuous, magazine-style look across entry, hallway, and main living areas without custom millwork. Your listing photographs like a full renovation, but the transformation was done with peel-and-stick power.
Conclusion: Stage Smarter with Lamination Film Instead of Renovation
Home stagers don’t need more stress—they need smarter, faster tools. Door-grade lamination decorative film delivers:
On-trend designs that complement popular wallpapers and staging styles
Flexible application on doors, cabinets, wall paneling, ceilings, displays, and frames
Lower costs and faster turnaround than traditional renovation
Durable, easy-clean surfaces that hold up through showings
Environmentally friendlier staging, upgrading instead of replacing
Ready to test lamination film on your next staging project?
👉 Get a free design consultation and sample recommendation within 48 hours.
Contact Today
📞 Phone / WhatsApp: +86 15738309271
Tell us your staging style, door quantity, and deadline—we’ll recommend the right wood, marble, metallic, soft-touch, or fabric-look films to turn your next listing into a “just renovated” showpiece.


Comments